While some of us might have heard from Let’s Encrypt and how it uses ACME for complete automation of certificate management, a few of us might even ask themselves: ‘Can I also run my own private ACME server in my home network?‘. The basic answer is yes, because ACME is a standardized and open protocol. As in many ‘make vs. buy‘ decisions a more detailed look will reveal that writing your own implementation of ACME is a lot of effort and thus not the right approach for a home project. Luckily there is smallstep – a company from in the bay area that provides an open-source certificate authority & PKI toolkit that we can use.
Installing step-certificates
There are two packages you need to install in order to start working: the step-certificates package provides the certificate authority (server) and the step-cli package provides a command line client.
andreas@acme ➜ ~ sudo pkg install step-certificates step-cli
After installation there will be a service script available.
andreas@acme ➜ ~ ls -lah /usr/local/etc/rc.d/step-ca
-rwxr-xr-x 1 root wheel 2.5K Oct 5 10:56 /usr/local/etc/rc.d/step-ca
Looking into the service script that will reveal a number of interesting findings:
- the rcvar we need to add to our /etc/rc.conf for service management has a value of step_ca_enable
- the directory that will contain all configuration (including the password) defaults to /usr/local/etc/step and after fresh installation this directory is completely empty
- the actual configuration file defining our step ca will be /usr/local/etc/step/config/ca.json
- the master password will be stored in plain text under /usr/local/etc/step/password.txt
- the service script implements a start_precmd that will interact with the command line in order to initialize a template config and password upon service start
First Time (Auto) Setup
We will append the step_ca_enable rcvar into our /etc/rc.conf so that we can use the service command to start and stop the step-ca service.
# Enable Step CA
step_ca_enable="YES"
Now, what we need to understand is that the start_precmd section of the service script (see last finding in above list) will simply call the step ca init command and then interactively collect a password for storing it in the password.txt file. Having said that, we will make use of that mechanism and let the command line guide us through creation of our PKI.
andreas@acme ➜ ~ sudo service step-ca start
No configured Step CA found.
Creating new one....
✔ What would you like to name your new PKI? (e.g. Smallstep): acme
✔ What DNS names or IP addresses would you like to add to your new CA? (e.g. ca.smallstep.com[,1.1.1.1,etc.]): acme.local,192.168.1.2
✔ What address will your new CA listen at? (e.g. :443): :8443
✔ What would you like to name the first provisioner for your new CA? (e.g. you@smallstep.com): firstprovisioner
✔ What do you want your password to be? [leave empty and we'll generate one]:
Generating root certificate...
all done!
Generating intermediate certificate...
all done!
✔ Root certificate: /usr/local/etc/step/ca/certs/root_ca.crt
✔ Root private key: /usr/local/etc/step/ca/secrets/root_ca_key
✔ Root fingerprint: 97f4728d915d001e51ceaab3e7343a60807625ca5d5d588c52b739b202fb0164
✔ Intermediate certificate: /usr/local/etc/step/ca/certs/intermediate_ca.crt
✔ Intermediate private key: /usr/local/etc/step/ca/secrets/intermediate_ca_key
✔ Database folder: /usr/local/etc/step/ca/db
✔ Default configuration: /usr/local/etc/step/ca/config/defaults.json
✔ Certificate Authority configuration: /usr/local/etc/step/ca/config/ca.json
Your PKI is ready to go. To generate certificates for individual services see 'step help ca'.
FEEDBACK 😍 🍻
The step utility is not instrumented for usage statistics. It does not
phone home. But your feedback is extremely valuable. Any information you
can provide regarding how you’re using `step` helps. Please send us a
sentence or two, good or bad: feedback@smallstep.com or join
https://gitter.im/smallstep/community.
Step CA Password file for auto-start not found
Creating it....
Please enter the Step CA Password:
Starting step_ca.
step_ca is running as pid 58450.
Obviously a template config that is ready to go has been created and the service already has been started. Let’s have a look at the directory structure in place, so we can better understand what has been done here.
andreas@acme ➜ ~ sudo tree /usr/local/etc/step
/usr/local/etc/step
├── ca
│ ├── certs
│ │ ├── intermediate_ca.crt
│ │ └── root_ca.crt
│ ├── config
│ │ ├── ca.json
│ │ └── defaults.json
│ ├── db
│ │ ├── 000000.vlog
│ │ ├── LOCK
│ │ └── MANIFEST
│ ├── secrets
│ │ ├── intermediate_ca_key
│ │ └── root_ca_key
│ └── templates
└── password.txt
6 directories, 10 files
The certs subfolder contains a root certificate as well as an intermediate certificate, which the keys for both are stored in the secrets subfolder. Both keys are encrypted with the same password that we’ve interactively provided at the command line when running our initial service start. That password has been stored as plain text in the password.txt file.
The config subfolder contains two json files. One file (ca.json) contains a list of all provisioners and the other file (defaults.json) contains some general information as to where the step ca can be reached and where the root certificate is located.
The db folder contains a NoSQL database with meta information on issued certificates.
The secrets folder contains the private keys for at least the intermediate certificate.
The templates folder will be empty upon initial setup but can be filled later on with certificate templates (very useful later on!).
Running a quick test
Of course we want to find out if our PKI is really running and visible from the outside. On a local command line (not the actual server running the PKI) we use openssl’s s_client command to check things out.
andreas@laptop ➜ ~ openssl s_client -connect acme.local:8443 -showcerts
CONNECTED(00000005)
depth=1 CN = myownlittleca Intermediate CA
verify error:num=20:unable to get local issuer certificate
verify return:0
---
Certificate chain
0 s:/CN=Step Online CA
i:/CN=myownlittleca Intermediate CA
-----BEGIN CERTIFICATE-----
MIIB2DCCAX+gAwIBAgIRAP9nSxkc+5TzPw9R3mUwtfIwCgYIKoZIzj0EAwIwKDEm
MCQGA1UEAxMdbXlvd25saXR0bGVjYSBJbnRlcm1lZGlhdGUgQ0EwHhcNMjAxMTI2
MTAzNzQzWhcNMjAxMTI3MTAzODQzWjAZMRcwFQYDVQQDEw5TdGVwIE9ubGluZSBD
QTBZMBMGByqGSM49AgEGCCqGSM49AwEHA0IABO7yVcVv1KLZ7e1QntLaSqPuFtGf
8aDuvYuoeP3KAsmcSGYbuukdIcXdL5VhRn10lXOIwGDnAxv+EzirHa94X46jgZgw
gZUwDgYDVR0PAQH/BAQDAgeAMB0GA1UdJQQWMBQGCCsGAQUFBwMBBggrBgEFBQcD
AjAdBgNVHQ4EFgQUtiU+/65AZJE7CAgRDK4QK/F6YgowHwYDVR0jBBgwFoAUQyq5
oSctWu9k7KSnAz2P5rtKz9UwJAYDVR0RBB0wG4ITYWNtZS50aW5raXZpdHkuaG9t
ZYcEwKgcDzAKBggqhkjOPQQDAgNHADBEAiABBBGCV2x2zKm/6ja3inn9/u8QKx+G
BTuCkGcj1XZzEwIgTO+r7KTh2nuaN+uQsJOb51ASqLD2GDfH47CKBfd03Wo=
-----END CERTIFICATE-----
1 s:/CN=myownlittleca Intermediate CA
i:/CN=myownlittleca Root CA
-----BEGIN CERTIFICATE-----
MIIBrTCCAVOgAwIBAgIRAKn1KuHAPtPlKVmfI0G8NQMwCgYIKoZIzj0EAwIwIDEe
MBwGA1UEAxMVbXlvd25saXR0bGVjYSBSb290IENBMB4XDTIwMTEyNjEwMzgzMVoX
DTMwMTEyNDEwMzgzMVowKDEmMCQGA1UEAxMdbXlvd25saXR0bGVjYSBJbnRlcm1l
ZGlhdGUgQ0EwWTATBgcqhkjOPQIBBggqhkjOPQMBBwNCAARYANusH97/11XzMIYf
7pgI1LEY8UpWVBiVF4/1m5rsaFg//kvkFklI7FjZ4nR4Ard7mqlrCDc16lseVMKl
mFNPo2YwZDAOBgNVHQ8BAf8EBAMCAQYwEgYDVR0TAQH/BAgwBgEB/wIBADAdBgNV
HQ4EFgQUQyq5oSctWu9k7KSnAz2P5rtKz9UwHwYDVR0jBBgwFoAUhArGpAX7JUjc
tn/PGaEkJkJ1tOMwCgYIKoZIzj0EAwIDSAAwRQIgbF/kVS7j+TFTZYpIoA3El+ty
rxRsD61qcT/UHEQSNSgCIQDFhRXerzwvQYz4BbpST2NfCdMvJaFVxrU99wTf4eUQ
bA==
-----END CERTIFICATE-----
---
Server certificate
subject=/CN=Step Online CA
issuer=/CN=myownlittleca Intermediate CA
---
...
Next, we could install a server somewhere and use acme.sh or certbot or similar to automatically retrieve SSL certificates. However, at this point we don’t want to do this because the auto generated setup is not exactly what we want (or need).
Custom Setup
As stated above, we do not want to use the auto-generated certificate authorities. We already have our own CA in place that we’d like to use. Also, we will issue an exclusive intermediate CA for our PKI off-band and import that. In addition we want to have multiple provisioners with different policies as to how long certificates issued are valid.
In this article I will not describe what a Root CA is and how it is being created, but just assume that we have setup one already that is ready for import. Still, if you want to learn more about how to setup a CA please read here.
Importing our own Root CA
What we need to do is to import our existing root certificate. The same holds true for the Intermediate CA. We can either put that into the certs folder or have our configuration point to a central location.
In either event we will not need the private key for from our Root CA!
In this example we will copy our root certificate into a central location under /etc/ssl and make it readable for everybody via a quick chmod 444 command.
andreas@acme ➜ ~ sudo ls -lah /etc/ssl/
total 45
drwxr-xr-x 2 root wheel 5B Nov 26 19:26 .
drwxr-xr-x 27 root wheel 109B Nov 26 11:35 ..
lrwxr-xr-x 1 root wheel 43B Oct 17 03:09 cert.pem -> ../../usr/local/share/certs/ca-root-nss.crt
-rw-r--r-- 1 root wheel 11K Jun 12 20:29 openssl.cnf
-r--r--r-- 1 root wheel 2.2K Nov 26 19:26 tinkivity.pem
For the next step, we need the 32-bit fingerprint from our certificate. Obviously the fingerprint below is redacted and you will not get any of the xx values as a reply on your command line.
andreas@acme ➜ ~ openssl x509 -fingerprint -sha256 -noout -in /etc/ssl/tinkivity.pem
SHA256 Fingerprint=00:xx:xx:xx:xx:xx:xx:xx:xx:xx:xx:xx:xx:xx:xx:xx:xx:xx:xx:xx:xx:xx:xx:xx:xx:xx:xx:xx:xx:xx:xx:99
We need to update /usr/local/etc/step/ca/config/defaults.json configuration file to reflect the fingerprint of our new root certificate. Please make sure to remove all colons (“:”) from the fingerprint in your defaults.json config. Again, below fingerprint is redacted and instead of the 30 pairs of xx you need to put the middle-30 actual bytes from your actual fingerprint. Also, make sure to update the location of the root certificate accordingly.
{
"ca-url": "https://acme.local:8443",
"ca-config": "/usr/local/etc/step/ca/config/ca.json",
"fingerprint": "01xxxxxxxxxxxxxxxxxxxxxxxxxxxxxxxxxxxxxxxxxxxxxxxxxxxxxxxxxxxx99",
"root": "/etc/ssl/tinkivity.pem"
}
The other configuration we need to update is /usr/local/etc/step/ca/config/ca.json as it also needs to know where our root certificate lives. The attribute for the root certificate location is most likely the first attribute at the top of the json configuration.
{
"root": "/etc/ssl/tinkivity.pem",
"federatedRoots": [],
...
Importing our Intermediate CA
Again, we have created our Intermediate CA off-band and only import it into our ACME server environment in this step. As our Intermediate CA will actually be used to issue certificates, we need both the x509 certificate as well as the RSA private key for the Intermediate CA. We will delete possibly existing certificates and keys from the certs and secrets folder and import our Intermediate CA instead.
andreas@acme ➜ ~ sudo tree /usr/local/etc/step
/usr/local/etc/step
├── ca
│ ├── certs
│ │ └── intermediate.cert.pem
│ ├── config
│ │ ├── ca.json
│ │ └── defaults.json
│ ├── db
│ │ ├── 000000.vlog
│ │ ├── LOCK
│ │ └── MANIFEST
│ ├── secrets
│ │ └── intermediate.key.pem
│ └── templates
└── password.txt
6 directories, 8 files
The x509 certificate (the public part) shall only be readable, but doesn’t need to be restricted. Thus, it is ok if everybody can read the file.
andreas@acme ➜ ~ sudo ls -lah /usr/local/etc/step/ca/certs/intermediate.cert.pem
-r--r--r-- 1 step step 2.2K Nov 28 14:39 /usr/local/etc/step/ca/certs/intermediate.cert.pem
The RSA private key on the other hand should be restricted. Nobody other the our step ca service user shall be allowed to read its contents.
andreas@acme ➜ ~ sudo ls -lah /usr/local/etc/step/ca/secrets/intermediate.key.pem
-r-------- 1 step step 3.2K Nov 28 14:37 /usr/local/etc/step/ca/secrets/intermediate.key.pem
Another and even more important line of defense is the passphrase that encrypts the RSA key. Even though somebody would come into possession of the RSA key file it couldn’t be decrypted without the proper passphrase. At the same time, the step ca service user needs to know that passphrase in order to sign new certificates. We have two options how to provide the passphrase to the step ca service:
- interactive command line prompt upon service start
- persistence in a text file
Obviously only the latter option allows unattended service starts (i.e. b/c of reboot) and we will use that option. The location for the password.txt file is manifested in the service script and by default points to the step ca root folder. In any case we must make sure that nobody else but the step ca service user can read the contents of that file.
andreas@acme ➜ ~ sudo ls -lah /usr/local/etc/step/password.txt
-rw------- 1 step step 12B Nov 29 12:56 /usr/local/etc/step/password.txt
The last step for setup of our Intermediate CA is to configure its location in the /usr/local/etc/step/ca/config/ca.json configuration.
{
"root": "/etc/ssl/tinkivity.pem",
"federatedRoots": [],
"crt": "/usr/local/etc/step/ca/certs/intermediate.cert.pem",
"key": "/usr/local/etc/step/ca/secrets/intermediate.key.pem",
...
Delete existing provisioners
When running the automatically guided setup in the beginning, we also created a provisioner named firstprovisioner which we actually don’t want to have any more. There is a step command that allows to manage provisioners – including listing of those.
andreas@acme ➜ ~ sudo step ca provisioner list --ca-url https://acme.local:8443 --root /etc/ssl/tinkivity.pem
[
{
"type": "JWK",
"name": "firstprovisioner",
"key": {
"use": "sig",
"kty": "EC",
"kid": "TRmwwSxlqIBSPDj6K5pAYrbcbCbkKPIWvPwDhuuqeWI",
"crv": "P-256",
"alg": "ES256",
"x": "EgXHqunMX0k3GbPkbCcrCN44wKcYgHaIKx6TZvGwAXk",
"y": "iGb2ToEVDC6yBgRxZoNa1MG1RAZUDrFokvim8Ugj9fg"
},
"encryptedKey": "eyJhbGciOiJQQkVTMi1IUzI1NitBMTI4S1ciLCJjdHkiOiJqd2sranNvbiIsImVuYyI6IkEyNTZHQ00iLCJwMmMiOjEwMDAwMCwicDJzIjoiWTdTU2kxaTJJRGpMQkY2cF9lNkFrQSJ9.6BhnTrakC_yUC1AMwIJ0pVW_spZode1Np8mba3ONk9NwCTErGb8upQ.tBP0pRs8ha6lijLz.pKHgHq6VChULDNvNWvHBYQMBeeGEJSOrVDU-9gA-soETOf4eLqjqy8OATp3pP3_TQ6y00E2ZziEnfJk58f3cbLT1lldas1yP0XYkc3gHitEwTfbFxppyp9ptjRzIPGby5ucVOzj0j9O8QiIetOc6Cri7rq9bpuTMyazAQlKJ84x1CeZz_hqBf3vxwHZHYODPaxG3u2nsWmjhFA8uJXPSHyic_sgZBi-sc5JGPVa2_4rG8EzM1yx2l0mUZLdVprAFZ0ciWvKRdqObXcbO_DiLn3p6aECFnLfEnvi0T8deoHhU0t5F28T4GNV_E9aq9h46A0O4rcLrXi9kgqs2g_k.eItQ0VITv702y3bFFkNnFQ"
}
]
More or less the command only dumps out the provisioner section of the configuration at /usr/local/etc/step/ca/config/ca.json which doesn’t seem very helpful when listing existing provisioners. However, the command becomes more helpful when modifying provisioners. First we will delete our existing provisioner. We can use the step ca provisioner command to do this.
andreas@acme ➜ ~ sudo step ca provisioner remove firstprovisioner --ca-config /usr/local/etc/step/ca/config/ca.json
Success! Your `step-ca` config has been updated. To pick up the new configuration SIGHUP (kill -1 <pid>) or restart the step-ca process.
As an alternative to the above command we can directly edit the configuration file at /usr/local/etc/step/ca/config/ca.json and replace the provisioners section by a NULL statement.
Below is the complete /usr/local/etc/step/ca/config/ca.json file matching our current progress.
{
"root": "/etc/ssl/tinkivity.pem",
"federatedRoots": [],
"crt": "/usr/local/etc/step/ca/certs/intermediate.cert.pem",
"key": "/usr/local/etc/step/ca/secrets/intermediate.key.pem",
"address": ":8443",
"dnsNames": [
"acme.local",
"192.168.1.2"
],
"logger": {
"format": "text"
},
"db": {
"type": "badger",
"dataSource": "/usr/local/etc/step/ca/db",
"badgerFileLoadingMode": ""
},
"authority": {
"provisioners": null
},
"tls": {
"cipherSuites": [
"TLS_ECDHE_ECDSA_WITH_CHACHA20_POLY1305",
"TLS_ECDHE_ECDSA_WITH_AES_128_GCM_SHA256"
],
"minVersion": 1.2,
"maxVersion": 1.2,
"renegotiation": false
}
}
Configuring a separate log facility
Let’s configure a separate log facility that logs to /var/log/step.log so that we have an easier job in following the log activities (other than to filter /var/log/messages all the time). We start by inserting the following two lines into the /etc/syslog.conf configuration.
...
# !devd
# *.>=notice /var/log/devd.log
!step_ca
*.* /var/log/step.log
!ppp
*.* /var/log/ppp.log
!*
include /etc/syslog.d
include /usr/local/etc/syslog.d
Next we create an empty log file under /var/log/step.log and make sure it has the same ownership and permissions than other log files under /var/log.
andreas@acme ➜ ~ sudo ls -lah /var/log/messages
-rw-r--r-- 1 root wheel 14K Nov 29 14:35 /var/log/messages
andreas@acme ➜ ~ sudo touch /var/log/step.log
andreas@acme ➜ ~ sudo ls -lah /var/log/step.log
-rw-r--r-- 1 root wheel 0B Nov 29 15:46 /var/log/step.log
Now, we restart the syslog daemon so that the new configuration is applied.
andreas@acme ➜ ~ sudo service syslogd restart
Stopping syslogd.
Waiting for PIDS: 38133.
Starting syslogd.
Finally, we can (re)start the step ca service and make sure the newly configured log file is being used. Assuming we have not made any errors in our configuration approach so far, our step ca should start without errors and be responsive at port 8443 already.
andreas@acme ➜ ~ sudo service step-ca restart
Stopping step_ca.
Starting step_ca.
step_ca is running as pid 39809.
andreas@acme ➜ ~ cat /var/log/step.log
Nov 29 15:48:34 acme step_ca[39809]: 2020/11/29 15:48:34 Serving HTTPS on :8443 ...
Running a quick smoke test
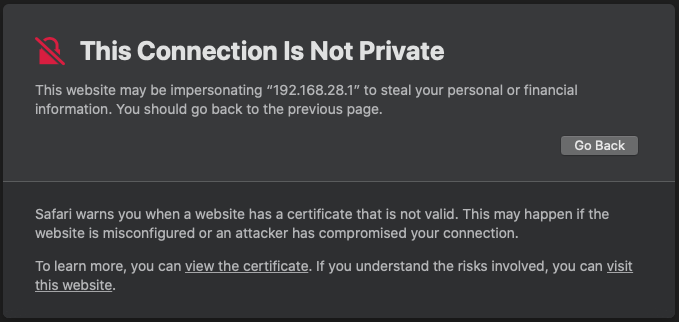
We could now run openssl’s s_client command again (see above) from a remote host or simply point a web browser at https://acme.local:8443. In both cases we should receive a reply that is including a correctly setup certificate chain.
andreas@acme ➜ ~ cat /var/log/step.log
Nov 29 15:48:34 acme step_ca[39809]: 2020/11/29 15:48:34 Serving HTTPS on :8443 ...
Nov 29 15:53:13 acme step_ca[39809]: time="2020-11-29T15:53:13+01:00" level=warning duration="38.366µs" duration-ns=38366 fields.time="2020-11-29T15:53:13+01:00" method=GET name=ca path=/ protocol=HTTP/2.0 referer= remote-address=192.168.1.205 request-id=bv1rbmajnji9n0kqlm10 size=19 status=404 user-agent="Mozilla/5.0 (Macintosh; Intel Mac OS X 10_15_7) AppleWebKit/605.1.15 (KHTML, like Gecko) Version/14.0.1 Safari/605.1.15" user-id=
Looking at /var/log/step.log again shows our step ca being responsive. Although the client only receives a 404 error in return, the meta data around that HTTPS request contains the proof that our setup works. It becomes even more clear when looking at the reply from openssl’s s_client command that we can run of our local laptop.
andreas@testclient ➜  ~ openssl s_client -connect acme.local:8443 --quiet
depth=1 C = DE, ST = Saxony, O = Tinkivity, OU = Tinkivity Intermediate Certificate Authority, CN = Smallstep Intermediate CA, emailAddress = xxx@xxx.com
verify return:1
depth=0 CN = Step Online CA
verify return:1
Of course, this is only a somewhat synthetic test, but it will show us that we’re well on track.
Adding a new ACME provisioner
This is a rather easy step because only two commands are involved. The first command adds a new provisioner of type ACME and the second command restarts the service.
andreas@acme ➜  ~ sudo step ca provisioner add acme-smallstep --type acme --ca-config /usr/local/etc/step/ca/config/ca.json
Success! Your `step-ca` config has been updated. To pick up the new configuration SIGHUP (kill -1 <pid>) or restart the step-ca process.
andreas@acme ➜  ~ sudo service step-ca restart
Stopping step_ca.
Starting step_ca.
step_ca is running as pid 41017.
Looking at the provisioners section in /usr/local/etc/step/ca/config/ca.json we can see that not that much has been added actually.
...
                "provisioners": [
                        {
                                "type": "ACME",
                                "name": "acme-smallstep"
                        }
                ]
...
Such default configuration would start to pass out certificates that adhere to smallstep’s default settings. One setting that we want to change is the validity of the certificates being issued. We actually like certificates to be valid as short as possible while still not adding too much stress to the infrastructure. We will thus agree to certificates being valid for 24 hours.
...
                "provisioners": [
                        {
                                "type": "ACME",
                                "name": "acme-smallstep",
                                "claims": {
                                        "maxTLSCertDuration": "24h0m0s",
                                        "defaultTLSCertDuration": "24h0m0s"
                                }
                        }
                ]
...